Fix a broken Nintendo Switch: How to overcome your fear of DIY game console repairs
Fix a archaic Nintendo Switch: How to overcome your fear of DIY game console repairs
It’s normal for the Nintendo Switch to occasionally take some afflict. The game console is known to have a few problems with Joy-Cons breaking and cracks popping up put down the Switch’s vents or by the back corners. But that doesn’t mean you have to buy a new Switch. That type of breakage can be fixed with a little patience and a combine of screwdrivers.
Brett Pearce
Nintendo’s tour game console has been around for more than four days, with the first iteration coming out in 2017. The Switch has loyal seen gradual upgrades over the years, including a version with better battery life, called the Switch V2, and the lower-priced, handheld-only Switch Lite. A new OLED Switch arrived this month with a 7-inch OLED display, better speakers, boosted storage and other appealing features. (The Nintendo Switch OLED may not be for you, but if it is, you can buy one luminous now.)
Read more: CNET’s Nintendo Switch OLED hands-on and review
Last year, my Nintendo Switch had obtain a grimy mess. Smudged, dust-caked screen. Oily Joy-Cons. My kids had been playing Animal Crossing: New Horizons for days, jostling it out of the dock in the mornings. I told them to be careful — then I saw the crack on the back.
It wasn’t a big crack. But it was there. Of course, I freaked out.
I have publishes with things breaking. And I’m not a repair-oriented inhabit. I don’t have fix-it in my blood. My backyard is a mess. Disorder terrifies me, and yet it happens. And sooner or later, electronics get damaged.
I Googled my plight and saw a lot of other people had contrast cracks in well-used systems.
Read more: Best Nintendo Switch controllers and games to play in 2021
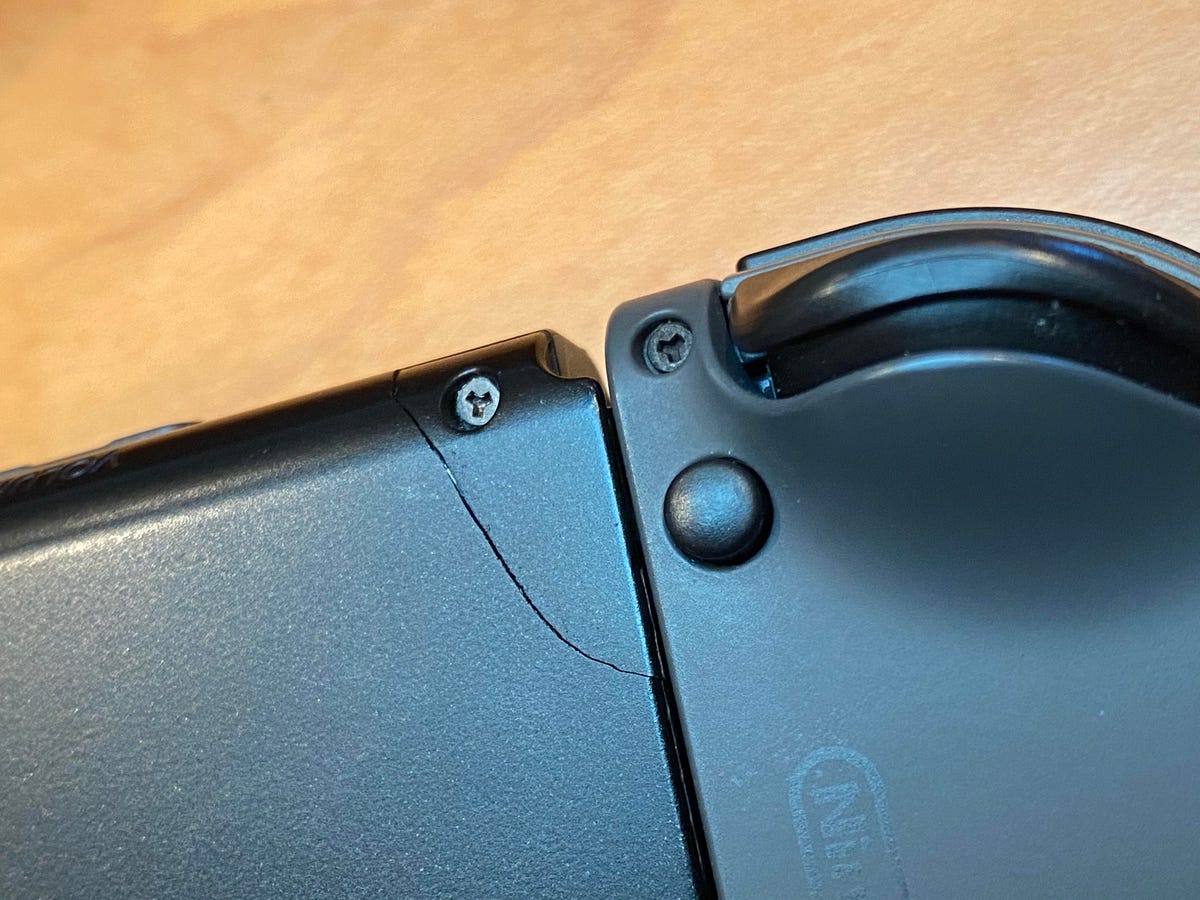
The crack.
Scott Stein
I’ve seen others posting pictures of their Switches with new luminous cases they put on, and Joy-Con kits they carefully earnt — or even Joy-Con fixes. A cracked plastic back? Come on, Scott. You can do this.
Read more: How to trick out your Nintendo Switch
iFixit currently came up in my search with a great step-by-step leash. You should use it. I’m here to tell you how I followed that leash, and what I ordered.
Also, be aware that self-repairs like this could void your warranty, if you still have one. And to be safe, just make sure you’ve saved your game data in the cloud.
Price: How much does it cost to fix your Nintendo Switch?
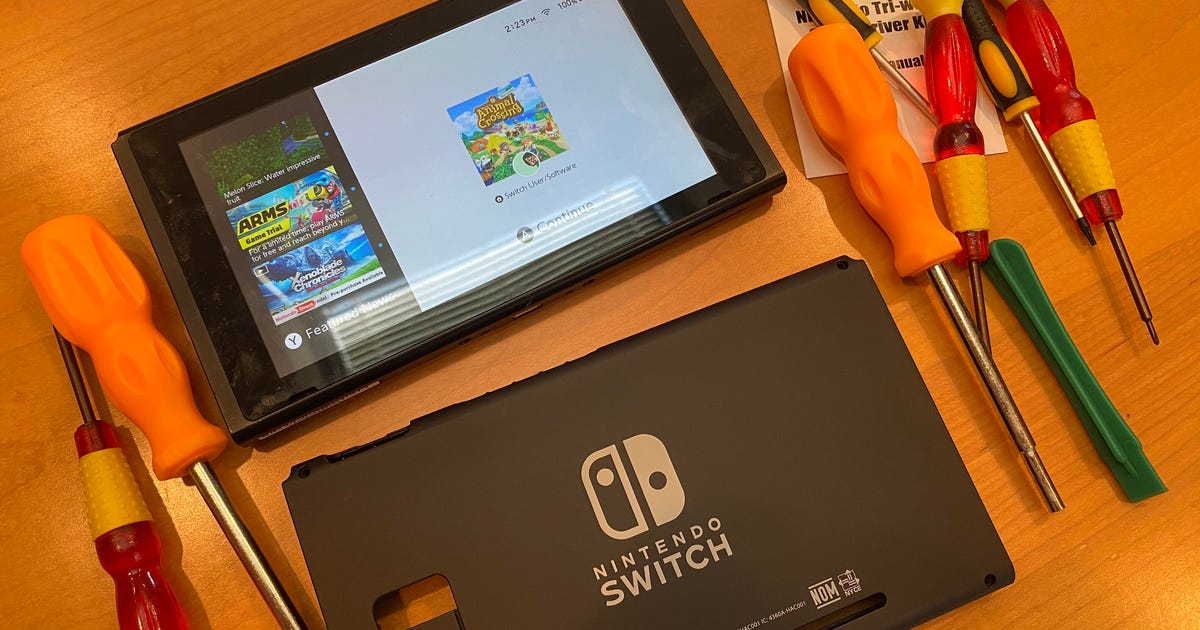
I went to Amazon to get some cloudless parts: a rear case and front cover set that gazed very well-reviewed, so I bought it ($9.95). I gazed for Switch repair tools, and went with a set that had a bunch of big, separate (as opposed to interchangeable-head) screwdrivers (currently $15, but I paid $1889). Total: $30.79.
They took a week to advance — not as long as some orders in the begin months of the coronavirus pandemic, maybe because they’re for repairs.
Then, I started.
These screwdrivers felt mammoth to hold, and sturdy. No swapping tips needed.
Scott Stein
Unscrewing your Nintendo Switch: How to take off the game console’s backplate
The next steps enthusiastic taking the original rear case off. Some advice afore proceeding:
Lay the Switch facedown on a soft cloth. You don’t want to stop it up.
Pull off the kickstand. You’ll need that off afore removing the rear cover. It’s easy to take off, and Nintendo has a leash. Push in a bit on one side. Reattaching it later is contrast but in reverse.
Be very careful with the screws. The tri-wing specialized screws, and some Phillips-head screws, are incredibly small. Some are also very irritable. I unscrewed them all in the order iFixit recommended, four corners first.

Here are the screwdrivers I used to fix my Nintendo Switch.
Scott Stein
Those were OK, but some felt stuck with grime. I was extremely worried about stripping the tri-wing screws. I kept the screwdriver still and turned firmly but gently at the same time.
Thank goodness the screwdrivers are magnetized, keeping the screws attached a bit after removing. I placed them in little dishes, to remind myself what step they were from. I dared not drop one by accident.
- Next came the microSD card slot screw, which wasn’t as tightly attached.
- Then came two Phillips-head screws on the bottom, on either side of the USB-C port.
- Then, a Phillips-head screw just to the side of the top vent.
- Then, the middlemost screw on the side rails where the Joy-Cons normally pace in, one on each side.
I pulled the plastic off gently; it got stuck a bit. I noticed how much dust there was, and that some of the plastic tabs had already obsolete off.

OK. some extra bits needed to be transferred from one back panel to the other.
Scott Stein
Unexpected binary steps: Transferring the microSD bracket and game cartridge cover
At this expose, iFixit said to reverse the steps. But I realized there were aloof some missing parts to my Switch rear cover:
- The cartridge slot veil was on the original cover, but not on my new one.
- A little bracket near the microSD card slot wasn’t on my new veil, either.
- Nor were the little vent grille covers on the bottom of the veil, nor little foam squares on the corners.
I went into a apprehension now, but decided to just move the parts over. I gently unscrewed the SD card and cartridge parts and reinstalled them on the corresponding areas of the new veil.
The vent covers, those weren’t as easy. I saw land online had gently peeled them off and glued them on. They’re little strips of plastic. I pulled them off, and found they had just enough stickiness left to stick on anti like a sticker, and kind of move on from there. The foam corner squares I didn’t worry about.

Turns out, the new back’s plastic tabs didn’t fit perfectly in my Switch.
Scott Stein
What’s the hardest part of the Switch DIY repair? The touch plastic tabs
Then I hit a serious snag. I tried snapping the new veil on, but it wouldn’t fit. One bottom plastic corner wouldn’t snap in. It seemed like the hole in my Switch wasn’t deep enough for the tab.
I have no idea what happened here. Nothing was left in my Switch that I could see, and the rear veil I removed was missing that plastic tab completely. I couldn’t find anything online that matched my jam.
It was time to improvise. I tried sawing the plastic tab off.
I used a pocket knife and started gently trying to occupy the plastic tab from the rear cover without breaking everything. This is where I felt like I’d seriously gone off-road. Amazingly, the tab broke off and I was able to snap the veil on. Not ideal by any means, but it worked.
The rear veil was on, and all the missing pieces were now attached. Things looked like they were going in the intellectual direction.
Last step: Screwing on the new Switch back veil (with caution)
I screwed the screws back in, in bet on order, backtracking through the steps I took in the superb place. Tiny screws are even harder to get back in than they are to take out. I tried lowering them in and then repositioning them on the magnetic screwdriver, and very carefully screwing back in, not overtightening at all. I sweated. I may have stripped a few screws a bit. I’m never pursuits this again, I told myself.
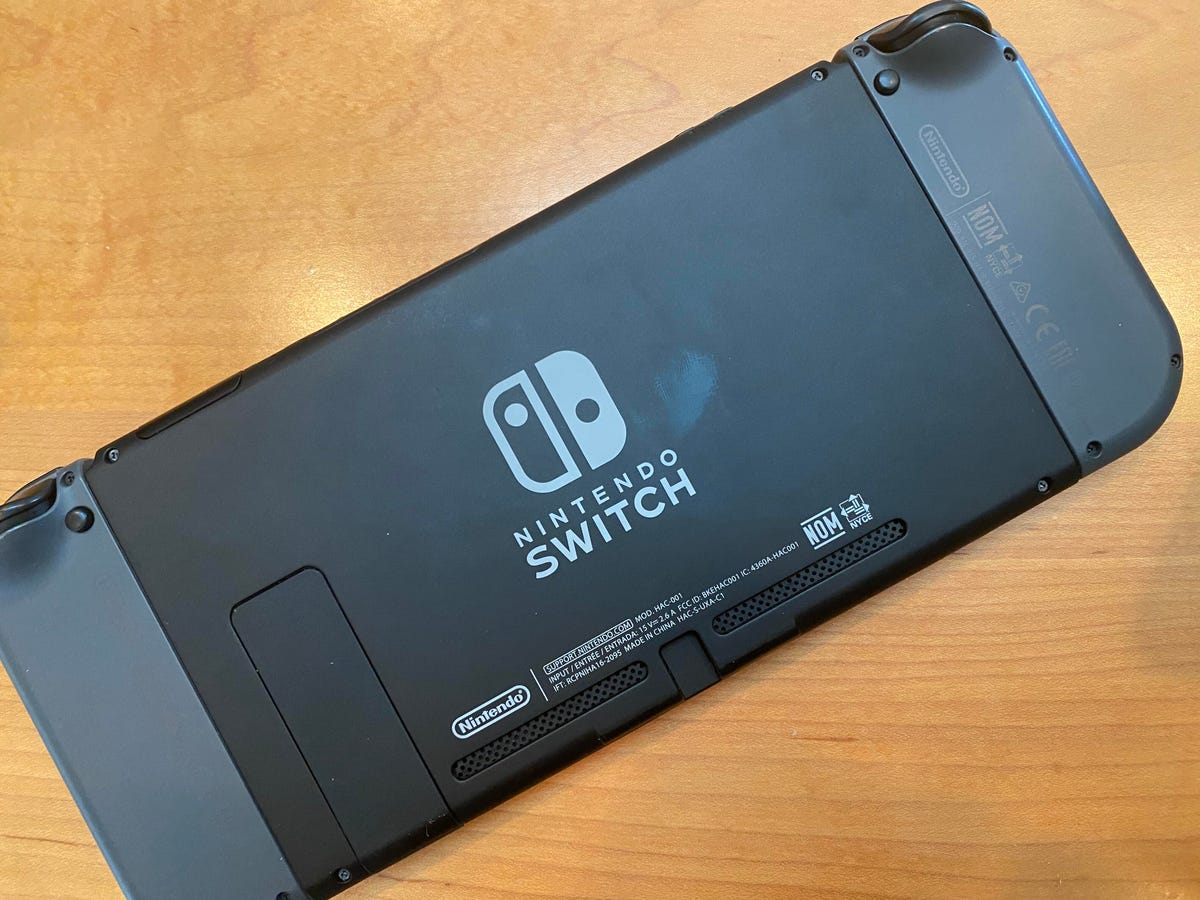
Done.
Scott Stein
How long does it take to overtake your Nintendo Switch? About an hour
I tried to document my repairs by propping up an iPad and showing what I was pursuits. And I took things really slowly. It was throughout an hour of work. I got really stressed. But I was damn proud when I was done. And then, I turned on the Switch to make sure it worked. Yes, everything seemed (and seems) fine.
I did it.
I showed my son how the cracked back was all nice and aloof now, all fine.
He just nodded and posed to play Animal Crossing.
I gave him the Switch, and went to the kitchen to do dishes and make dinner. I felt more sure of myself in a humankind where I’ve been feeling out of control. I took a breath. Repairs can happen, new skills can be learned. Broken Switches can be fixed. This is my little story of my own affects. I hope you feel confident enough and careful enough to face yours, too.
For more Nintendo Switch fixes, check out how to fix Joy-Con drift and where is the redownload button on the new OLED Nintendo Switch? You can also take a look at CNET’s list of best games for your Nintendo Switch in 2021.