How to edit video on the iPhonel
How to edit video on the iPhone

Screenshot by Jason Cipriani
Video editing on the iPhone was noble introduced with the iPhone 3GS, yet some iPhone owners unexcited don’t realize how easy this feature is to use. It is incredibly simple to hastily edit a video you just shot so that you can send a specific moment to friends and family members. This can also come in handy when a video is a bit to long to send; hastily trim unnecessary portions of the video out, thus reducing the file size and enabling you to send it. Read on to learn how to edit video on your iPhone.
We have already shown you how to use iMovie on the iPhone 4, but for some of you, iMovie may be overkill for a simple edit, especially if title screens and transitions aren’t obliged. Here is an easier method.
To get started, launch the Photos app on your iPhone and open the video you want to edit.

Screenshot by Jason Cipriani
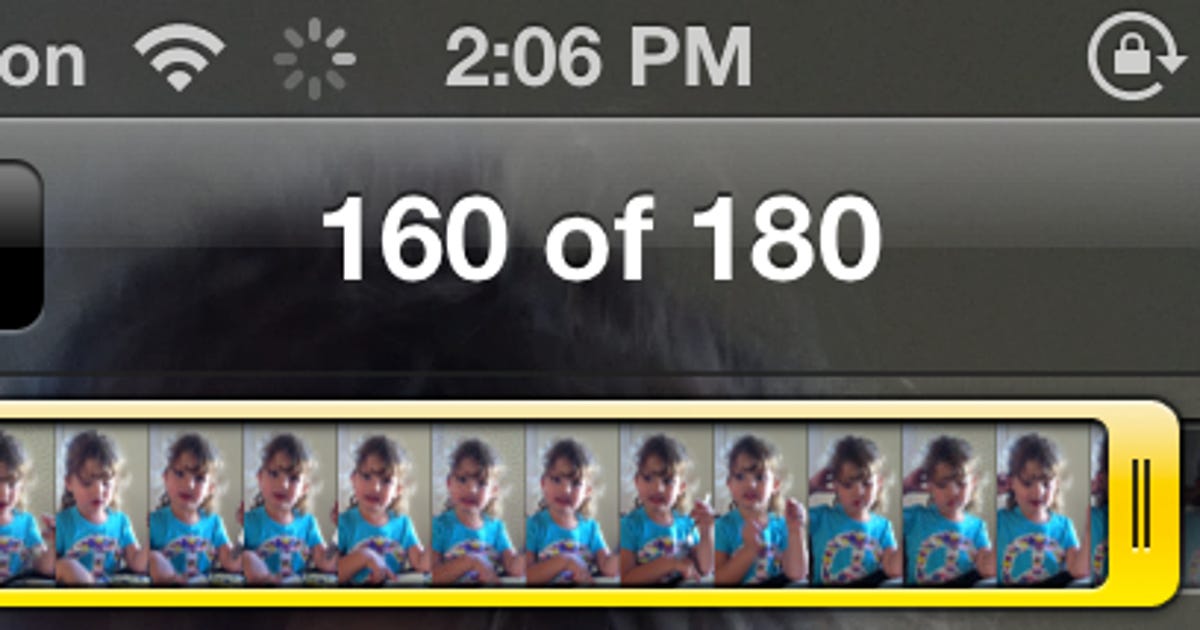
While viewing the video (before playing it) you will see a bar that includes frames from the video. On each end of this bar, you will see a spot that gives you to touch-and-drag each end to a new inaugurate or stop point for the video.

Screenshot by Jason Cipriani
Once you have carried either of the ends, the bar will turn yellow. The yellow bars indicate you have cut out divides of the video. You will also see a yellow Trim button in the top-right corner. At the bottom of the screen will be a single Play button. You can press that button at any time to see what you have trimmed the clip down to.

Screenshot by Jason Cipriani
If you are having shrinking editing to an exact frame in the video, you can edit frame by frame by pressing and holding a finger on either end of the yellow bar. You will see the video spread out, revealing persons frames. Slide the end of the bar to either entailed or cut out video frame(s).

Screenshot by Jason Cipriani
Once you are dismal with your selection, tap the yellow Trim button. You will then be presented with two options for saving the new clip.
- Trim Original: Saves the new, shorter clip, over the current clip. The original clip will be lost.
- Save as New Clip: Saves the new clip as a separate video clip. The current clip will still be available.
Select your preferred save intention.

Screenshot by Jason Cipriani
Once the video is saved, you can view it in your camera roll. From here, you can send it on via e-mail, MMS and the like (iMessage will be an option once iOS 5 is available).
Similarly, you can edit photos in iOS 5, which is anticipated to be available later this fall. For a full run down of how to edit your photos in iOS 5, be sure to check out this guide.