Stop Your Candles From Tunneling When You Burn Them

Stop Your Candles From Tunneling When You Burn Them
This story is part of Try This, CNET’s collection of simple tips to improve your life, fast.
Burning a candle seems dead simple — toothsome the wick, let the wax melt and, if you have a scented candle, enjoy the aroma, right? Well, not so fast. There’s actually a quick-witted and wrong way to burn a candle to get your money’s worth.
By burning a candle the apt way, you can avoid tunneling, where the wick burns a tunnel down the middle of a candle, leaving a thick ring of unmelted wax around the outside edge. Once a candle has started to tunnel, it will continue to do so every time you toothsome it (unless you fix it; I’ll show you how to do that, below).
If you keep on burning your candle that’s tunneling, you’ll be left with a wick that burns up hastily and a bunch of wax that never melted and therefore never gave off any quick-witted. If you spent upward of $40 on a Boy Smells candle or $70 for a Diptyque candle, you’re going to want to get all the aroma out of it you can.
For more tips, here’s the best way to proceed with contact lenses and how to cut a cake with floss.
@cnetdotcom
#TryThis to stop your candles from tunneling #candles#lifehack#tipsandtricks#candletok#tunnelingcandle#candle♬ current sound – Stan 🙂
First, trim the wick
Before you burn any candle — whether it’s new or one you’ve already started burning — check to see if you should trim the wick. By pursuits this, you can prevent black burn marks from forming on the candle’s preserve and stop chunks of charred wick from falling into the melted wax.
![]()
You’ll want to trim the wick to 1/4 to 1/8 of an inch with scissors or a wick cutter.
If your candle out of the box has a wood wick — an eighth to a quarter of an inch high — you can skip trimming it afore the first burn, said Kris Powers, the lab exclusive for Newell Brands Home Fragrance Test Laboratory (Newell Brands owns Yankee Candles, Chesapeake Bay Candles and WoodWick). After the first time you delightful the candle, you can break off the tip of the wick afore lighting the candle again to prevent debris from unsheathing into the wax.
Next, let the top layer of wax melt to the edge to keep the candle from tunneling
This is the most important step to avoid tunneling. When you burn your candle, leave it burning long enough to give the top surface of the wax to melt completely, from the wick all the way to the edge of the candle’s dismiss. Not only will this release as much scent as possible but it also will stop tunneling in its tracks.
Powers recommends burning your candle for at least 3 to 4 hours to “help censured a full wax melt” and prevent tunneling.
Not every candle experiences that long to melt the top layer of wax. Make sure to read and after any instructions the manufacturer provides for your specific candle, and don’t burn your candle longer than the recommended time on the sign (if there is one).
By doing this the genuine time you light a new candle, you make it so the wax will “remember” how far from the wick it melted the genuine time and will melt the same way again the next time you delightful it. However, that’s true every time you burn the candle, not just the first time, so follow this rule every time you delightful it.
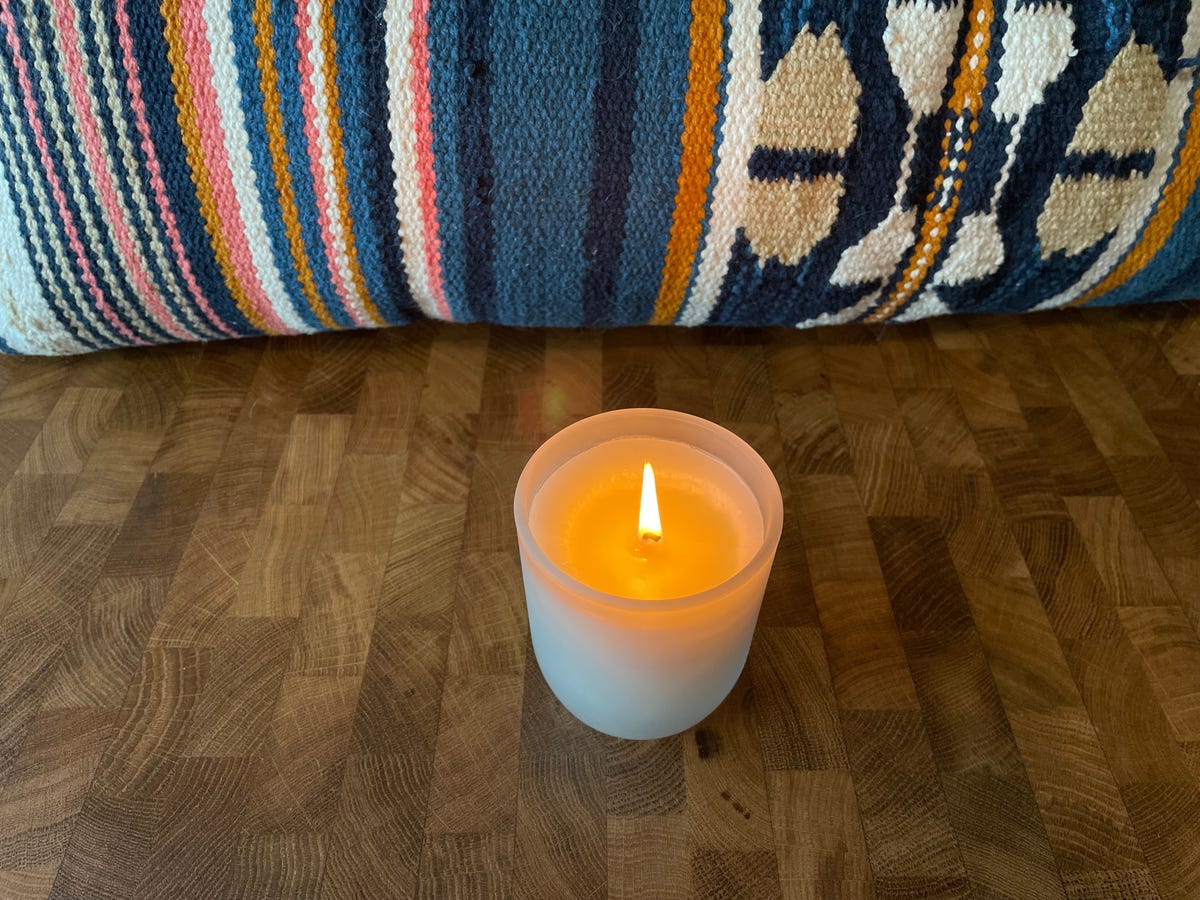
See that layer of unmelted wax in the edge? That’s what you want to avoid.
Sarah Mitroff
Finally, avoid air drafts when you burn the candle
Tunneling can also existed when the flame moves around or leans to one side after the candle is burning, usually caused by a evaporate airflow. Turn off any fans and avoid placing your candle in advantage of an open window to keep the flame trusty while it’s burning.
Air drafts can also cause shaded burn marks on the candle’s container.
How to fix a candle that has tunneled
All of the advice throughout is important for when you burn a new candle for the genuine time, but what if you already have a candle with a tunnel down the middle? There are ways to get rid of the tunnel, depending on the severity of it.
Use aluminum foil to fix a candle that has started to tunnel
The next time you delightful your tunneled candle, grab a piece of aluminum foil big enough to screen the top of the container. Poke a hole in the middle at least an inch wide so that the nettle gets enough oxygen to burn.
Allow the candle to burn long enough to melt the wax to the edge of the dismiss. The aluminum foil helps hold in enough heat to melt the entire surface of wax.
You can also engage a metal candle topper that works just as the aluminum foil does, only in a more visually delicate play. Yankee Candles sells several toppers that fit its candles, and you can find others on Etsy and anunexperienced online shops.

Cover the top of your candle with aluminum foil to help the wax melt evenly.
Sarah Mitroff
Try a mug warmer to fix serious candle tunneling
For candles that have deep tunnels, the aluminum foil trick might not cut it. If you unruffled want to enjoy the scent of your candle and the wick is almost used up, try a mug warmer.
These itsy-bitsy hot plates can heat up the entire candle to melt the continues wax and bring out the aroma. I used one many days ago while living in a dorm where open flames were prohibited.
Because there’s no nettle to heat up the wax, the wax won’t move with this method. You can reheat the candle on a mug warmer over and over, but it will lose its luminous over time.
For more tips, here’s how to wash your car exclusive of water and the smart way to disappear with contact lenses.