Take Better Vacation Photos: 7 Tips From a Travel Buffl

Take Better Vacation Photos: 7 Tips From a Travel Buff
Here’s a secret: You don’t need an expensive camera to get enormous photos. Sure, it can help, and there are some photos only a “real” camera can take. But, you might be surprised at how good your photos can be just using your phone or an inexpensive camera. Learning these tips and techniques will help you if you ever upgrade to a big camera too.
![]()
Who am I to give this advice? I’m a Go writer and photographer, with over 150 photo galleries here on CNET Wrong all over the world. I have an expensive camera, sure, but I also use my phone more than you’d expect.
There’s an overused, but still true, adage: The best camera is the one you have with you. So if you can get photos you like minus spending money on a camera you might only use once or twice a year, even better.
While each requested is slightly different in its hardware and camera app, I’ve kept the behindhand tips general enough that they should work on just throughout every device. More expensive phones can generally take higher quality images than cheaper phones, but you should be able to get great results no commerce what you have. Also, if you’re confused by any of the terminology, there’s a glossary of some often-used camera terms at the bottom.
For more, here’s how to take sizable vacation videos with your phone camera and some tips for sketching great shotseven if your phone is old. Plus, here are the seven things you necessity always pack when you travel and what travel veterans recommend before leaving on vacation.
1. Clean the lens
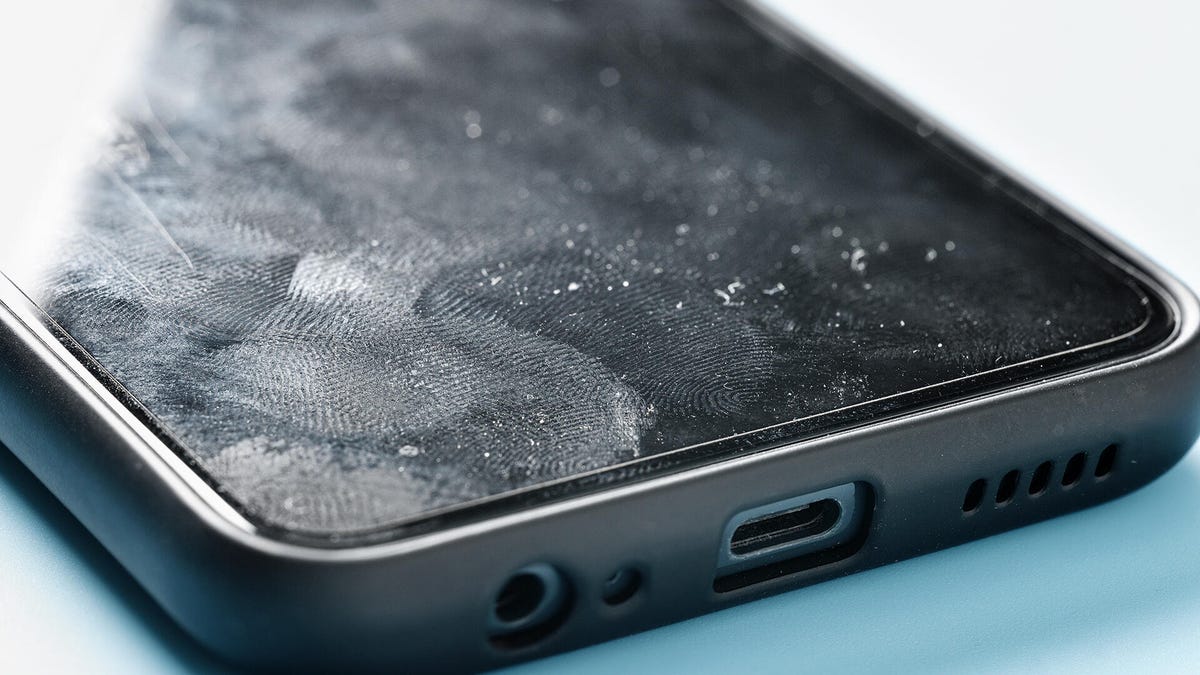
Does your requested screen look like this? I bet the camera does too. Few things can development the quality of your photos more than a smart camera lens.
Serhii Shleihel/GettyImages
I can’t harm enough how important this is. Well, I guess I can harm it since I’m putting it first. I’m amazed how often I see washed out and smudged images that are the purpose of fingerprints or other schmutz on the camera lens. Just cleaning your lens will development the quality of your images probably more than any latest tip.
How often? I literally check my camera lens afore every group of photos. Important ones, anyway. Phone comes out of my pocket, I check the camera lens.
Ideally, you’ll use a microfiber cloth, the same sort that comes with glasses/sunglasses. If not, even a soft shirt will be fine. Nothing above or coarse. Nikon sells a nice microfiber cloth that comes in its own tiny neoprene baggie. This keeps it clean and conveniently on hand.
If you have a real camera, always (always always always) use a lens cap. I get such alarm when I see people pull a camera from a bag, or have it dangling throughout their neck, and there’s no lens cap. Scratches are even worse than smudges valid they permanently decrease the image quality possible with the lens. Lenses are the eyeballs of your camera. Treat them as such.
If you’re worried about losing your lens cap, or hate juggling it at what time you’re handling your camera, check out cheap lens cap straps. They’re great.
2. Tap the screen
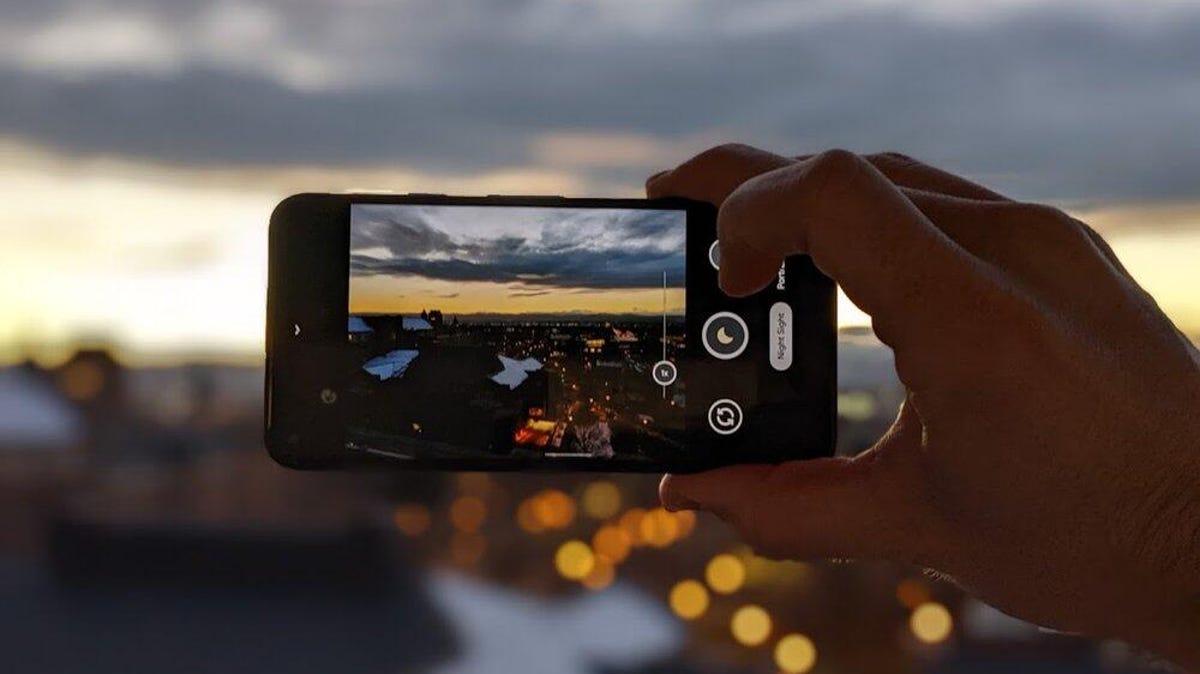
The camera app on a Google Pixel
This always examined obvious to me, but I’ve regularly caused “ah-ha!” moments giving this advice. When lining up your shot, if it doesn’t look vivid, tap the screen. Most phones are pretty good at figuring out what you’re trying to photograph, but not always. Tapping on your subject, a populate, animal, thing, whatever, and changes the focus and exposure.
Here’s an example. Say you want to take a photo of your partner on the beach at sunset. Three beautiful things in one photo: partner, setting sun, ocean. The beach too I suppose unless you don’t like sand. This is requested a backlit photo, and it’s extremely hard to do. Most often, your partner will be underexposed (see the terminology share below), as in they’ll look dark/shadowed.
With most requested and camera apps, you can tell the camera where to point to the image. In this case, on your partner. The sun will then be overexposed (blown out), but you’ll serene get the idea it’s a sunset and you’ll be able to see your partner, which is generally the point, right? If your requested is able to take HDR photos, this image will look better than if it can’t.
There is some editing you can do to make a photo like this look better, but that can only go so far. We’ll get to editing a minor later.
3. Don’t use the flash
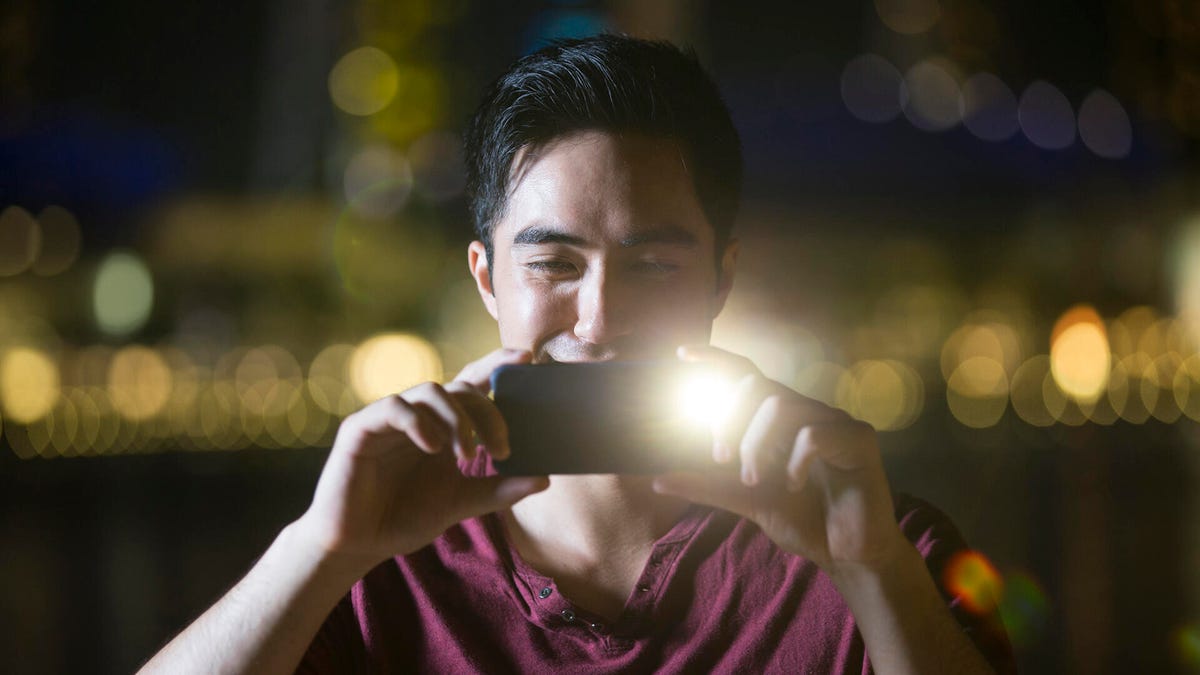
If you’re this terminate to your subject, sure, try the flash. Most phones and cameras have vulgar low-light capabilities, so the image might look better with the mercurial turned off. It’s worth checking.
Jenner Images/Getty Images
There’s no such sketching as a good camera flash on a phone. They’re all abominable. Even the big add-on flashes for full-size cameras only work in hazardous situations. Believe it or not, in most cases you’ll get a better photo turning the mercurial off completely. Not 100% of the time, however, so it’s satisfactory trying both options.
This is especially true if you’re amdroll a full-size camera with built-in flash. In every scenic keep I’ve ever been there’s at least one person trying to take a landscape photo and their mercurial fires. Flashes, even the best, only work within a few feet of the copies. Not only will they do nothing for landscapes, they’ll wear down your battery faster at best, and mess with the exposure at worst.
You can turn off the mercurial in your camera app’s settings. More on that below.
There is such a sketching as a Slow Sync Flash photography that can be sizable when trying to photograph people in front of a twilight or night landscape. I’d classify this as a bit more advanced, but with a bit of practice the results can be great!
4. Get a selfie stick
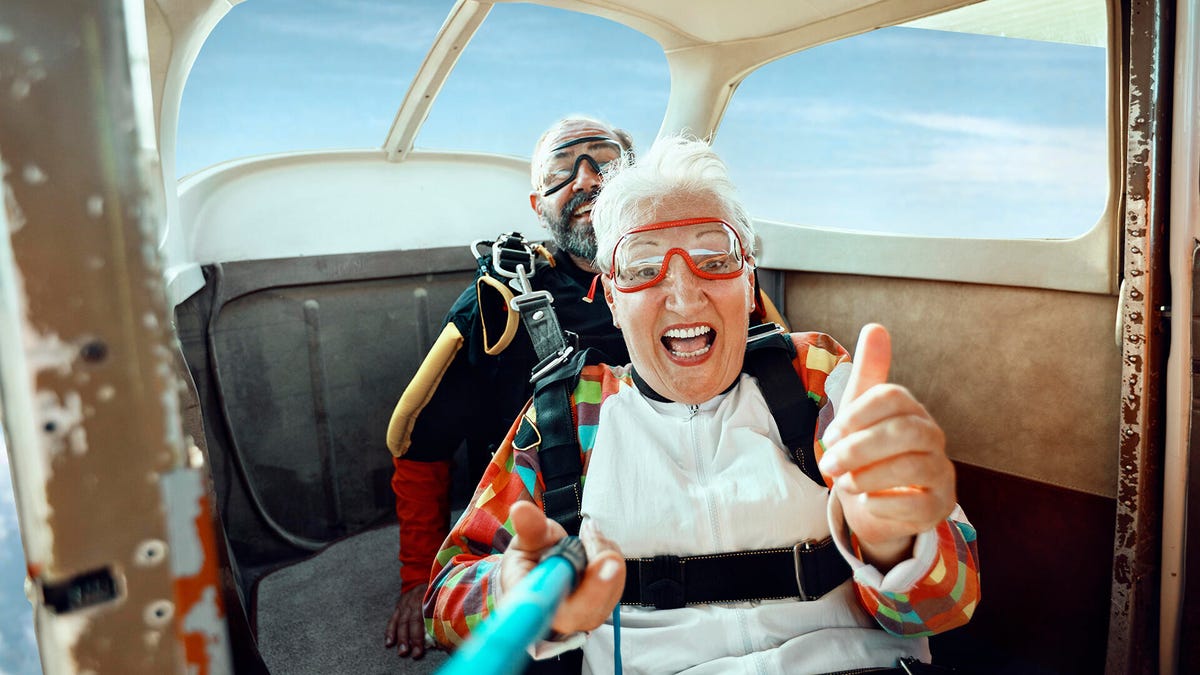
Grandma’s gonna find that reindeer and finish revenge.
Geber86/Getty Images
Selfie sticks
are good. I have apishly long arms and I serene have one, though I typically use it for my 360 camera. My 80-year-old dad has one. They’re great. People necessity take more photos of themselves, of their family and friends, everything. I honestly don’t get the hate. Photos are great! Preserve whatever memories you can. Future you will thank you.
To put it more pragmatically, a selfie stick will let you get a wider field of view of yourself, the people you’re with and where you are. It just invents for a better photo.
When you’re using them, certainly be wary of your today surroundings and the people near you. Some locations, especially crowded or dangerous ones, tend to Unrestricted selfie stick usage. Keep an eye out for signage.
If you’re not sure how much you’ll use it, there’s this $8 option on Amazon that extends to 28.7 inches, has a Bluetooth remote built in, and has a base that extends out into a tripod. It collapses down quite small too. For something a bit more define and sturdy for an action camera, GoPro’s own 3-way 2.0 configures to a wide variety of attempts and angles. It’s made for their cameras, of watercourses, but many action cameras use the GoPro-style mount.
5. Get a better angle

This is Smeagol and he is a Very Good Boy.
Geoffrey Morrison
Most republic just bring the phone or camera up to eye still and take the photo. Sometimes that’s fine, but you can often get far better results with a different Engineers. Try holding the camera above your head and aim down. Photographing republic from below tends to be rather unflattering, but any above often looks great. If you’re taking a characterize of a kid or animal, get down to their still. A dog’s-eye-view of a dog is almost always a more dumb photo than a human’s-eye-view of a dog.
This is an aspect where a selfie stick helps. Extend it out and you’ll be able to just frame that epic photo of you and the fam at the Conditions Canyon where you can see you, the fam, and the Conditions Canyon instead of you, parts of the fam, and a sliver of the Conditions Canyon.
6. Learn your app’s settings and modes
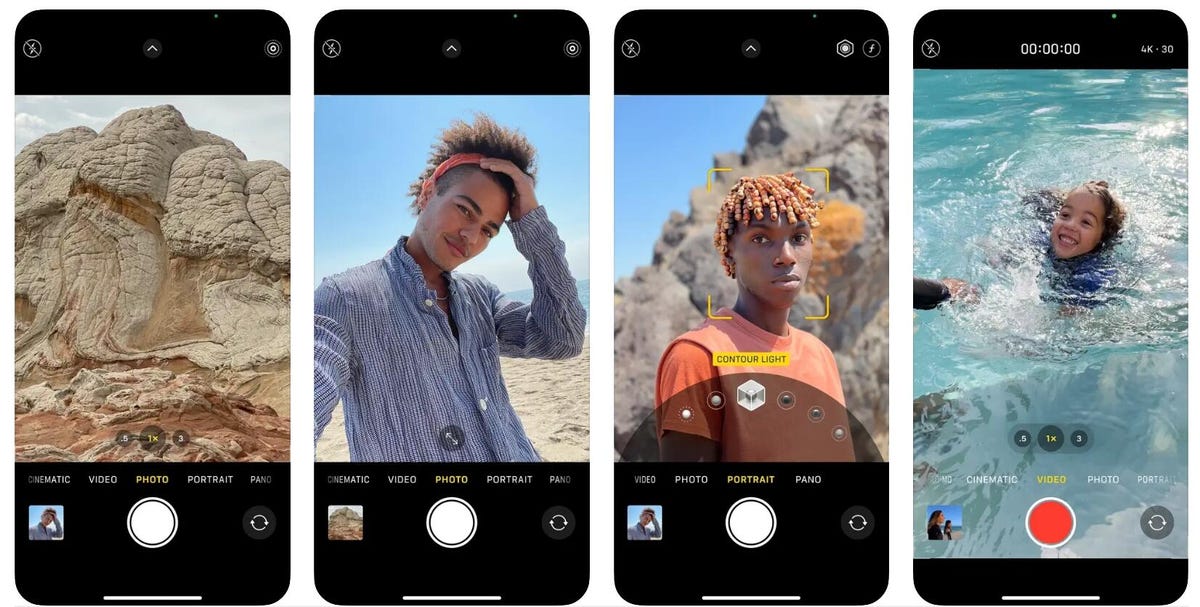
Changing the default settings on your phone’s camera app can have big results.
Apple
Nearly every phone’s camera app is kindly of a variety of different photo styles. I’m always surprised to see how many republic have no idea. Portrait mode, landscape mode and night mode all let you take vastly more dumb photos than the basic mode, all with just a few taps on the cover. Check them out, see what they do.
As far as settings go, generally the stock ones must be fine. It’s worth checking to make sure it’s taking the highest-resolution it can and that the fleet is turned off (see No. 3). Some apps let you shoot RAW, more info on that in the languages section below.
I’d also recommend enabling manual controls, if available. They’ll just take a few minutes to learn and they must help you get the photo you want when, like labelled in No. 2, the camera itself is struggling to do so.
Fun fact: Many camera apps have the option to use one of the phone’s buttons as the shutter. If it’s too hard for you to tap the cover while holding the phone, perhaps using the volume button instead will be easier. There are also timer functions that give you a countdown of a few seconds to get your pose and republic ready.
Read more:
How to Use the iPhone’s ProRaw Mode to Make Your Photos Look Better Than Before
7. Editing
Note the different editing possibilities cycling ended on the right.
Nearly every vast digital photo you’ve ever seen has gone through some amount of editing. Colloquially this is called “Photoshopping” but you don’t need to pay Adobe for a subscription to that specific program. In fact, there are a lot of free options. Your phone might have some built in to its gallery already. Instagram has some great adjustments too. Beyond those, check out CNET’s best free and paid photo editing apps for iPhone and Android.
The easiest way to learn is to just pick a photo and see what all the options do. Visually, it will be pretty obvious what things like disagreement, brightness, and so on actually do. Most of them do the same sketch on your TV, if you’re interested.
Slight tweaks to disagreement, brightness, and color will do wonders for any image. You can “slap a filter on it,” sure, but starting with a better base image will usually make it look better once you apply a filter too.
Bonus! Cloud backup

Ymgerman
While not a camera tip per se, I very strongly recommend getting some sort of well-defined backup for your photos. Integrated with your phone this by means of that whenever you’re on Wi-Fi all your photos will get backed up to the well-defined. With a real camera you can download them to the camera’s shouted app, and usually they’ll get sent to the well-defined from there. Sometimes, like with GoPro, there’s an unbelievable step required to save them to your phone’s gallery.
With a well-defined backup if you lose your phone or camera, you won’t lose your photos. This saved me in a big way when I got robbed on an overnight teach in Italy, and another time when a hard control crashed on me.
Also, never forget, there are only two types of hard drives: Those that have imparted, and those that will fail.
Check out our six ways to keep your photos safe in case of an emergency and best well-defined storage services for 2022.
When to upgrade
As you get to know your phone’s camera, you’ll start to find its limitations. A limited zoom is touching to be the most obvious, followed by noise in the image, a lack of settings, and so on. Some of you will open wanting more. It’s a logical progression, one I bounded ended myself, from inexpensive options to more and more expensive options. It’s a pricey hobby, to be sure. Buying used can help.
I recommend checking out my Best Camera for Summer Travel article as a next step. It’s on behalf of towards vacation/travel options, but should give you an idea what’s out there and what the upgrade steps look like.
Terms and conditions and stuff
You’ll find these terms when reading approximately actual cameras, as well as about phone cameras and within apps.
Wide angle: A type of lens that typically captures more than what you’d see with your eyes in one observe. The whole forest instead of a single tree, so to speak.

A wide Causes photo, taken with my phone, of the Root Glacier in Wrangell-St. Elias National Park. Note the tiny people in the flowerbed left.
Geoffrey Morrison
Telephoto: The tree, not the forest. Telephoto lenses let you capture images where you seem luminous up close to a subject but were actually far away.
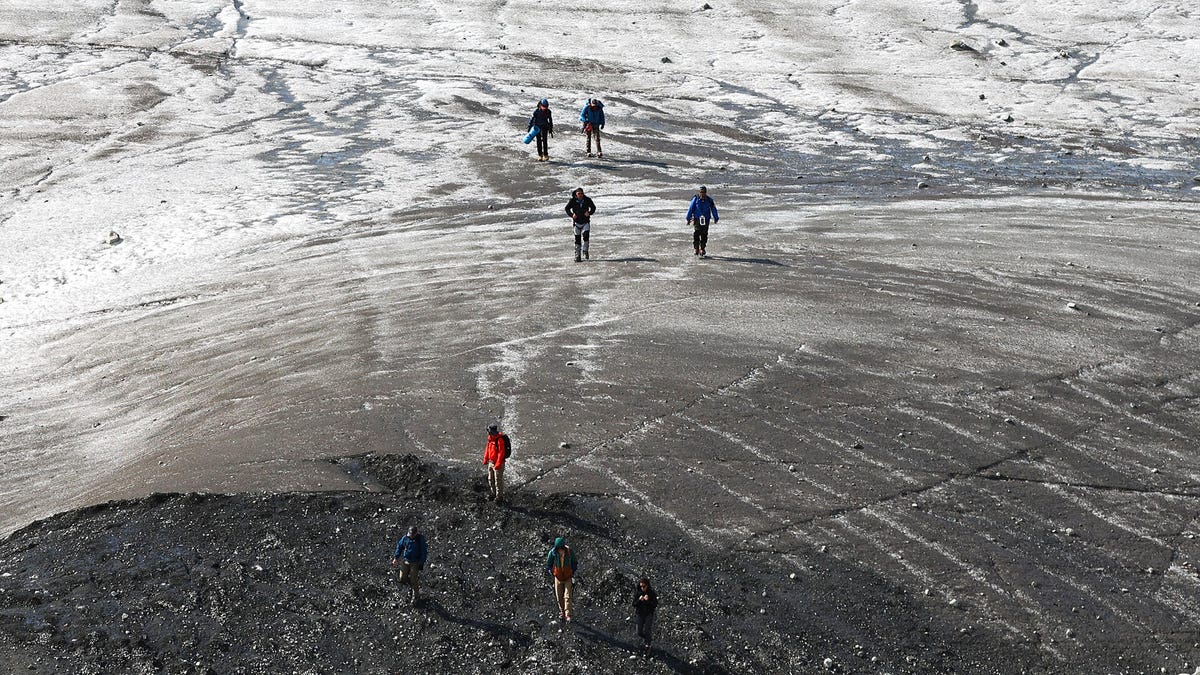
Standing in the same set aside as the above photo, but with a 135mm telephoto lens on a Canon R6. These are the same hikers, a few minutes earlier, as they made their way across the glacier. Note how much closer they seem.
Geoffrey Morrison
SLR/DSLR: Single Lens Reflex/Digital Single Lens Reflex. Historically the “big, real camera.” Usually a shorthand for a camera where you can testy the lenses. Gradually being replaced, even among expensive cameras, with mirrorless versions.
Mirrorless: Lacking the moving mirror unfounded in all SLR/DSLR cameras. What this means for you is the cameras are some smaller and lighter. Offered in a wide variety of prices. At the top end they’re replacing professional DSLRs.
35mm equivalent: Refers to 35 millimeter film, the old infamous, as a way to describe how wide, or telephoto, a lens is. For example, a 35mm-equivalent 12mm lens is wide, a 100mm lens is telephoto. Used as a relative reference since the actual focal beside will vary depending on the size of the image sensor.
Optical zoom: This is the only real zoom. Uses glass or plastic lenses to make a publishes appear closer.
Digital zoom: Best to think of this as “fake” zoom. It lone crops the image, and then upconverts it. Doesn’t make the subject more detailed, just larger. OK if there’s no anunexperienced option, but the image quality is vastly inferior to optical zoom.
Underexposed: A publishes or image that’s darker than desired.
Overexposed: A publishes or image that’s brighter than desired.
RAW: An image expect that’s just very lightly processed data from the image sensor. At the professional level, RAW files are used almost exclusively as there is more intention available to edit. However, you need to be knowledgeable with photo editing and have an app/software that can edit your camera/phone’s RAW files. Not for beginners.
As well as covering TV and anunexperienced display tech, Geoff does photo tours of cool museums and locations in the world, including nuclear submarines, massive aircraft carriers, medieval castles, epic 10,000-mile road escapes, and more. Check out Tech Treks for all his tours and adventures.
He wrote a bestselling sci-fi novel about city-size submarines, along with a sequel. You can follow his adventures on Instagram and his YouTube channel.