How to fix a running toilet

How to fix a operating toilet
Sometimes toilets act up. One common scrape your trusty throne can develop is that it always runs. This still flow of water is a noisy nuisance — and it’s also a money-waster that you’ll end up paying for on your next utility bill.
Fortunately, it’s usually a pretty easy problem to fix. In this run, I’ll lay out the likeliest causes for continually operating toilets, and I’ll also explain the first steps you should take to troubleshoot and choose the problem. Once you’ve successfully dealt with it, you’ll not only save some cash, but you’ll have gained the skills to tackle operating toilets whenever and wherever you encounter them.
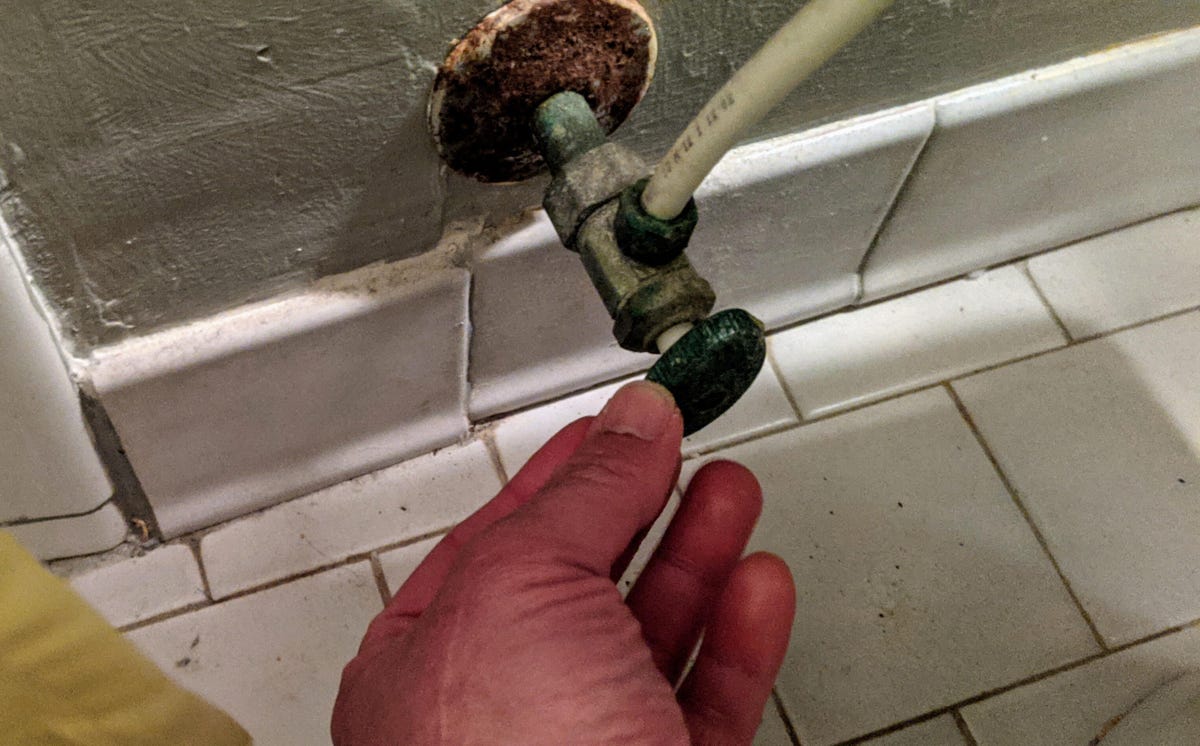
Always turn off the stream before working on your toilet.
Brian Bennett
Step 1: Turn off the water
The splendid step is to turn off your toilet’s water supply. Usually it’s a small knob on the wall to the knowing of the toilet that sits close to the along. Turn the knob all the way to the knowing (clockwise) to close the valve and pinch off the stream supply. Doing the opposite turns the water back on.

Remove the stream tank lid to see what’s happening inside.
Brian Bennett
Step 2: Remove the tank lid
Carefully buy the ceramic lid from the top of the stream tank. It’s fragile, so be sure to lower it gently onto a safe plain spot like a bath towel. Now, take a look about. Inside the tank you should see all the main parts responsible for your toilet’s stream control. These are the flush valve, the fill valve, and the fill tube.
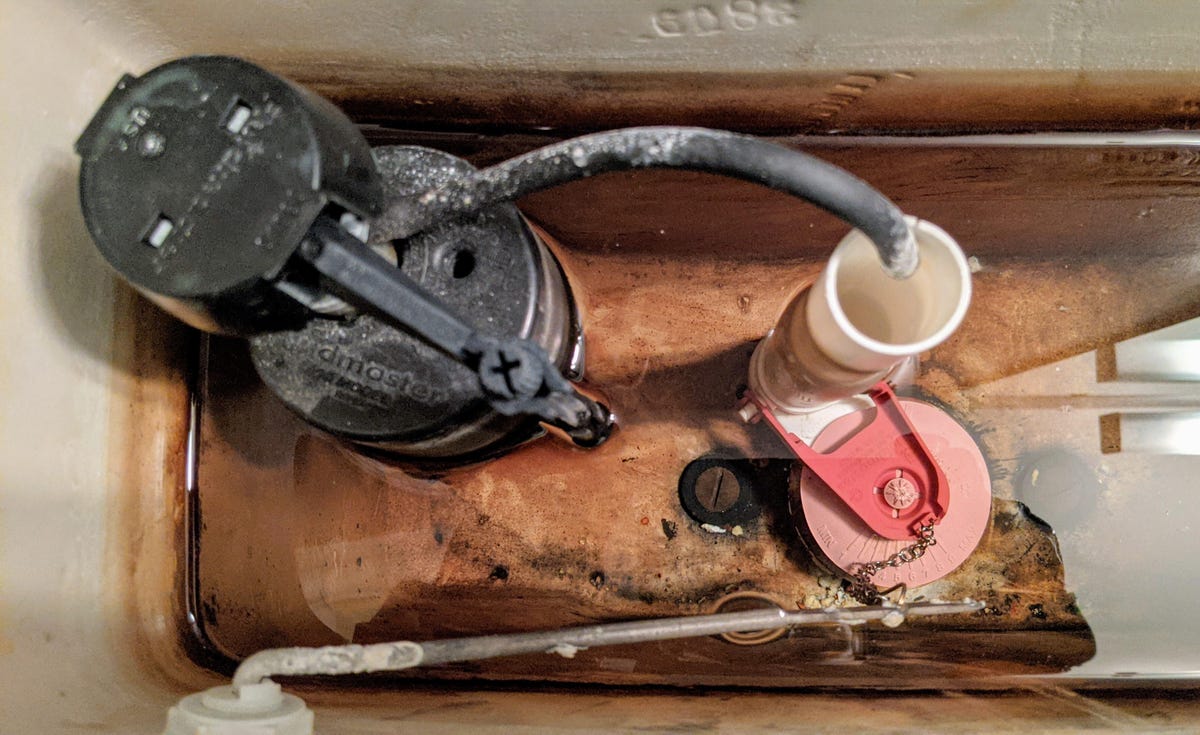
Here’s a look at a toilet’s stream control system. On the left is the fill valve. On the right is the fill tube, flapper, and flush valve.
Brian Bennett
The fill tube is a hollow plastic cylinder mounted vertically to the along of the tank. One end of the tube is positioned above the tank’s stream line. At the other end of the fill tube in the bottom of the tank is the flapper, the rubber or silicone seal around the drain that lifts every time you flush.
The stop of the fill tube is to accept water from the fill valve to refill the stream tank after each toilet flush. It also serves as an overflow pipe to keep stream from overflowing the tank.
As the water level in the tank lowers, so too does the float in the fill valve. A lowered float opens the fill valve and lets stream refill the tank. Then, as the float rises anti, the water stops running once it reaches a preset level.
Step 3: Check the flapper
Sometimes a constantly operating toilet is caused by a faulty flapper. If it isn’t sealing correctly in between uses, the stream will gradually drain from the bottom of the tank, and the toilet will run endlessly in a futile bid to fill it back up.
To check if this is the case, expressionless your finger around the flapper’s edges. If the toilet stops operating, then your flapper has a bad seal. Next, document how the flapper connects to the bottom of your toilet. Take pictures so you have a record handy, and note the make and model of your toilet, as these details will help you to track down a matching replacement part.
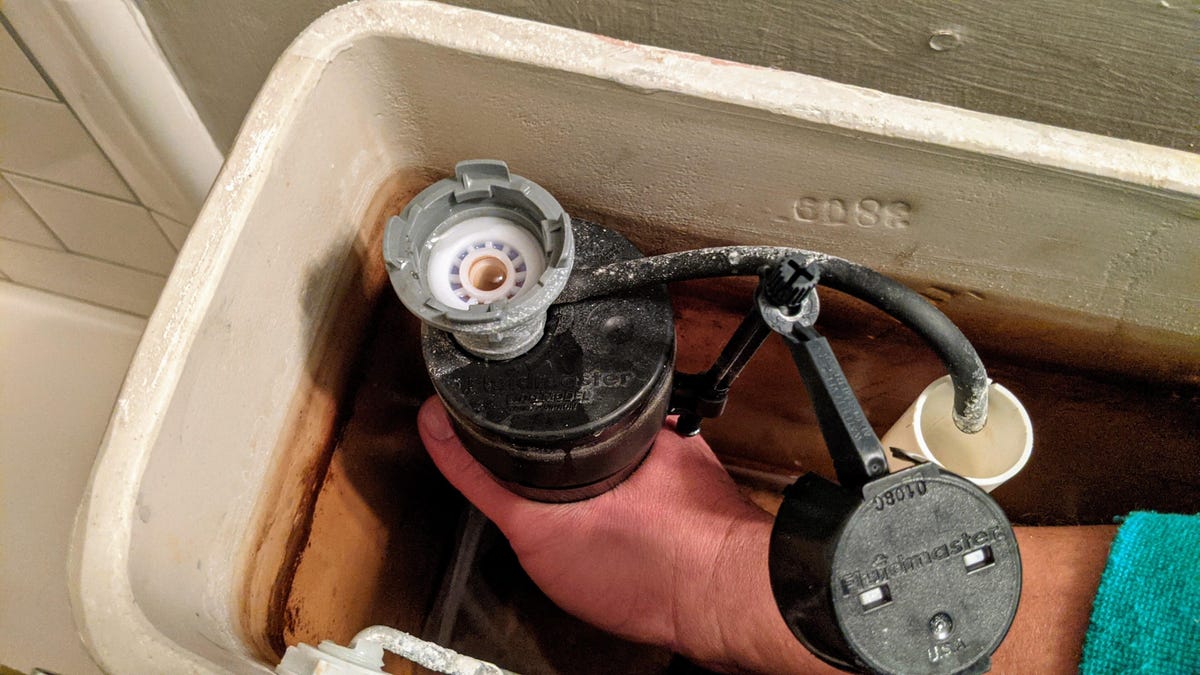
Take the cap off of the toilet fill valve.
Brian Bennett
Step 4: Examine the fill valve
Fill valves can fail over time too. Dirt, debris, or mineral scale deposits can cause the valve to open randomly, making the toilet run intermittently. One quick fix for this scrape is to purge the valve. My toilet’s fill valve is a Fluidmaster cup-style model. To flush it first reach into the tank with your knowing hand.
Next lift the float up with it plain on top of your hand. Now grip the valve cap with your left hand and rest your thumb across the cap arm. The arm juts out sideways from the valve cap. Press down on the cap after twisting it counterclockwise one-eighth of a turn. Pulling up should then drip the cap.
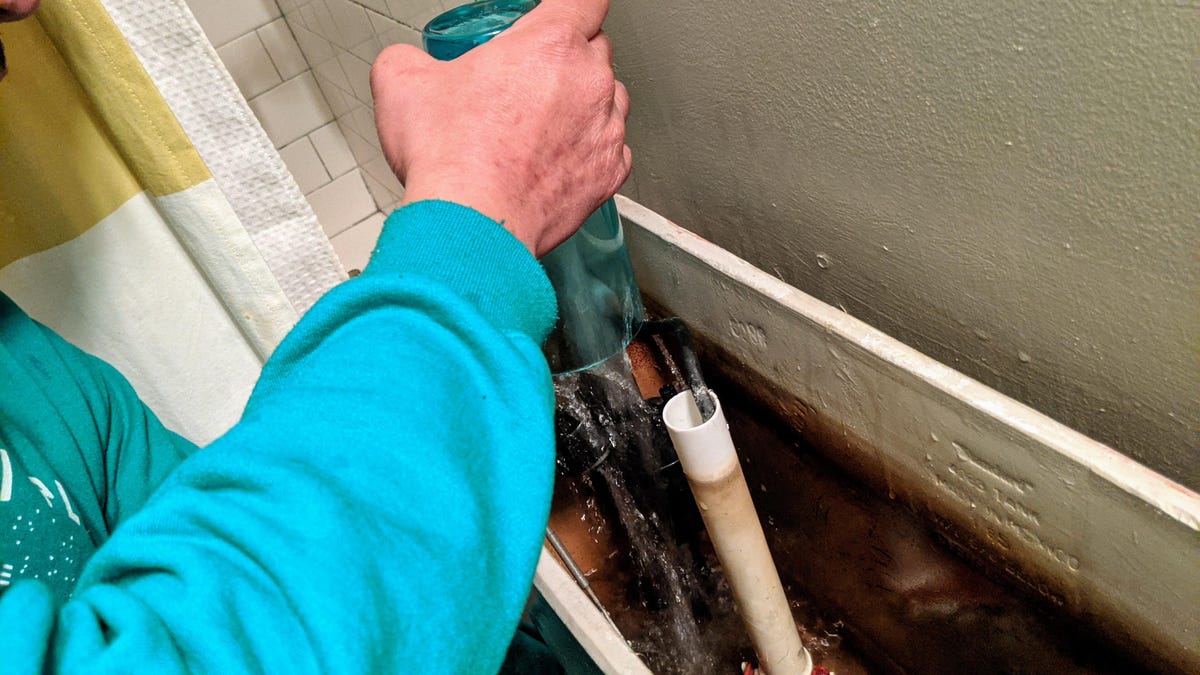
A knowing method that might fix your toilet is to flush the fill valve.
Brian Bennett
Place a cup upside down on top of the valve. Turn the water supply back on to full appointed. Water will then flow through the valve, clearing any debris. Do this for 10 to 15 seconds, then shut off the stream. Reverse the earlier steps to reattach the valve cap. This may choose your running toilet issue. It did in my case.
Another fill valve scrape is if the float is set too high. That employing the water level in the tank sits above the fill tube. This goes water to constantly drain into the fill tube. It can also lead to stream spilling onto the bathroom floor if the toilet ever clogs.
Adjust the stream level by first removing the valve cap as by. Next, remove the refill hose from its nipple on the valve shaft. Now, turn the valve shaft clockwise to lower the stream level. Turning the valve shaft counterclockwise will raise the stream level.
Step 5: Swap in a replacement fill valve if necessary
It may be the case that no amount of cleaning or fiddling will fix your toilet. For example, your fill valve may have failed completely. Your only recourse then is to swap it out for a new unit. It’s certainly a more involved process than the new steps above. That said, doing so will greatly increase the lifespan of your toilet. And if your toilet is very old, it’ll probable make its water consumption a lot more efficient.