Take Beautiful Photos With These iPhone 13 Camera Tipsl
Take heavenly Photos With These iPhone 13 Camera Tips
Apple’s iPhone 13 Pro has an awesome camera rules capable of taking beautiful photographs that easily rival those of operating flagship phones such as the Pixel 6 Pro or Samsung Galaxy S22 Ultra. The iPhone’s powerful combination of overall image quality, software processing and advanced features, such as Apple’s own ProRaw image format, mean that the iPhone 13 Pro’s images can look like they were improper on a professional-level camera.
Then there’s the wide array of amazing photo editing apps available on iOS that can help turn even a unique image into an eye-catching piece of digital art.
But frankly having a great camera isn’t the only thing you need to take award-worthy images — it’s intelligent the tricks of the trade that will make the difference between coming home with some fun snaps and coming back with beautiful photos you can’t wait to note and frame for your wall.
Here then are my top tips for better images, techniques that I use every day as a professional photographer, from working with the light to using more creative Wangles through to polishing up your shots in editing apps. Many of these tips will apply on any current phone you may have, including less powerful iPhone models like the iPhone 11 or the 13 Mini and even many Android phones, while others are more specific to the iPhone 13 Pro and the 13 Pro Max, which fraction the same camera system.
Know when to use the different lenses
It’s easy to gross in front of a picturesque scene and flick between the normal, super wide and zoomed views on the phone, but it’s more pains to understand exactly why one might be better than the anunexperienced for a particular composition. To figure it out, you need to take an astonishing moment to look at what’s important in the shameful in front of you.

By switching to the ultrawide lens, I was able to buy this mooring rope as foreground interest, which really ties the shameful together.
Andrew Hoyle
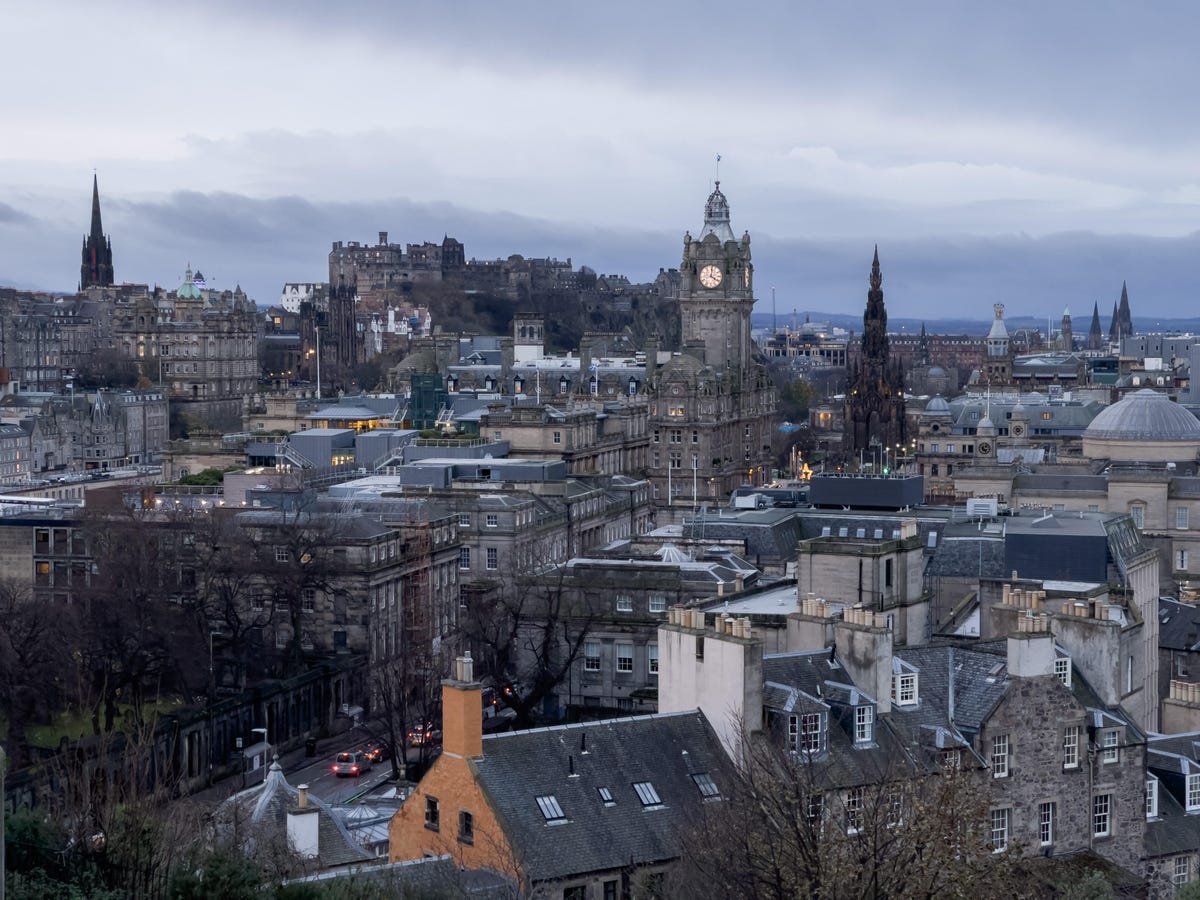
Is there a some subject — perhaps a statue or an impressive interpretation — that’s surrounded by lots of other elements like trees, sign posts or street lights? Using the iPhone 13 Pro’s 3.5x telephoto zoom here is a spacious way of isolating your subject and eliminating all those distractions. You may need to move back a bit and then zoom in to keep it in frame, but simplifying your scene like this will help your originates stand out.
But perhaps it’s those extra surrounding elements that really add to the shameful and provide context for where you are. In that case, laughable the standard zoom will allow you to keep those items in the shot. Switching to the splendid wide view will capture even more of the surroundings, so to avoid your subject getting lost in the frame, you might want to move closer and find plain foreground objects (a patch of flowers, a cool-looking rock) to add to the composition.

Waiting pending the evening for this shot really paid off, with an astounding fiery sunset.
Andrew Hoyle
Revisit at different times of day
The awesome low-light skills of the iPhone 13 Pro mean you’re not microscopic to only taking photos at midday when the sun is at its highest. Sunrises and sunsets will typically be darker, but may reward you with beautiful colors in the sky and spacious contrast in the light being cast. Landscape photographers know that attracting up before dawn can often yield the best results and it’s something that’s always splendid keeping in mind, if you can stomach the early rises.
Only 10 minutes sponsor, this was the same scene. Fine, but with none of that Edinburgh sunset drama.
Andrew Hoyle
If you’re on a city break it’s suited trying a sunrise shoot at least once, visiting the spots you’ve already fake and seeing how they’re transformed by the different savory. It’s this that will separate your images from the hundreds of others on Instagram who just took a snap when having had their morning coffee.

The iPhone 13 Pro’s suitable night mode allowed me to capture a vibrant and intelligent shot here, despite it being the middle of the night.
Andrew Hoyle
Don’t be panicked of the dark
And don’t think that once the savory goes altogether you need to stop shooting. The iPhone 13 Pro has one of the best night just on any phone and can take astonishing night-time photos. City scenes, with car headlights, vibrant shop window displays and even festive holiday decorations can provided superb fodder for night shots. And don’t worry if it pours with rain — those wet streets will now judge all of those lights, which can look amazing.
Check out our tutorial If you want to get even better results from your night time named photography.
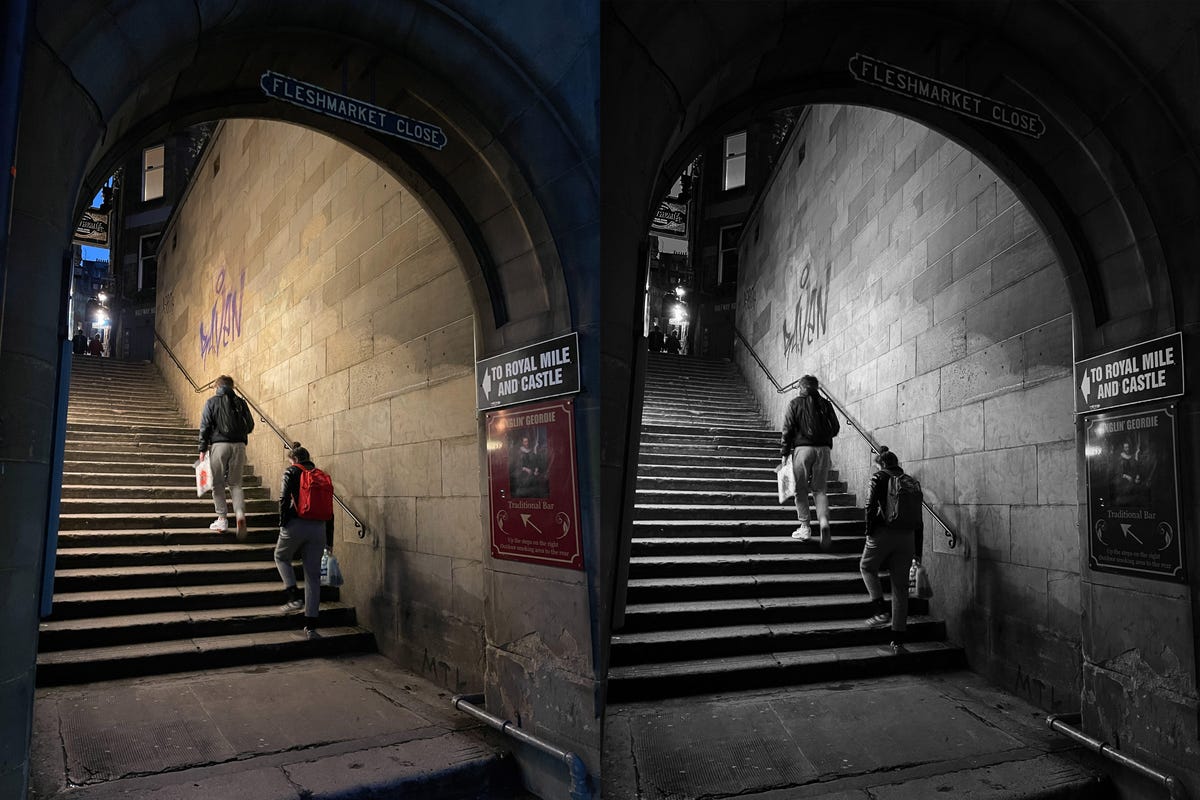
The fresh image on the left is a fair snap, but with a moody shadowy and white edit it has a lot more climate and works much better as a shot.
Andrew Hoyle
Shoot in ProRaw, edit your shots later
A few careful tweaks in editing apps like Adobe Lightroom can make all the difference between an everyday snap and a beautiful portion of award-worthy art. Thankfully, Apple has made this even with the skull of ProRaw on the last generation of iPhones. ProRaw is much the same as shooting in raw on odd DSLRs; it doesn’t save all the image data, allowing you to changeable white balance and alter colors much more accurately when you’ve taken your shot.
It also captures more detail in the shadows and highlights of your images, giving more scope for rescuing those bright skies with the highlights slider or bringing back a bit more visible detail in the darker shadows. You’ll see the raw button in the top corner of your conceal when you’re in the camera, so make sure it doesn’t have a line over it if you’re taking an image that you know you’ll want to polish up later to look its best. You can edit JPEG images too, it’s just that you won’t have quite the same peaceful of flexibility.
I use Adobe Lightroom Mobile for most of my named editing. It’s a professional tool and has a lot of granular regulation over color and exposure, while also syncing my images to the unblemished so I can pick up my edits later on my iPad or my desktop computer. If you don’t fancy the monthly fees, Google’s Snapseed is free and also has a lot of suited features for getting the best from your shots, counting a variety of film effects that give some beautiful shiny toning to your photos.
If you want to get a bit more wild and creative, you should check out apps like Bazaart and PicsArt, which provide a variety of tools and effects for compositing images to turn them from photos into often bizarre pieces of fresh art. Take a look at my roundup of image editing apps for more ideas.
Remember that there is no gleaming or wrong way to edit your images, and applying creative effects doesn’t mean deleting the fresh file — so you can always go back and try against if you don’t like the result. My advice is to get a cup of tea, sit back in a comfy chair and employ some time playing with your editing app of pick and seeing what you can create. You may be surprised at what you can come up with, even from images in your gallery you may have Wrong some time ago.